

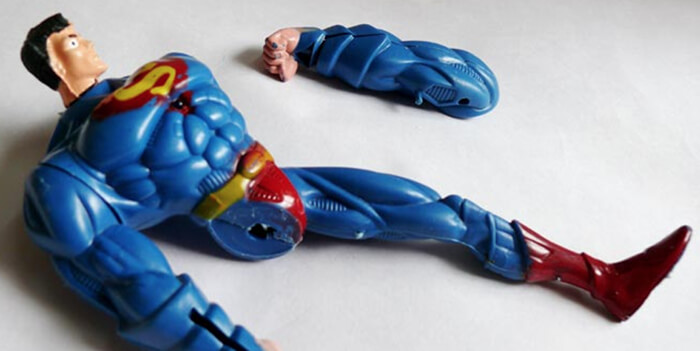
Parents around the world share a common worry about their kids. They dread the day when their child breaks their favourite toy. You can hear the crying and tantrums now. Kids play rough with everything, and there’s only so much a fragile toy can take. And more often than not, buying a new one doesn’t always work. Your child wants their toy! If you ever find yourself in this situation, don’t worry. Below is a simple step-by-step guide on how to repair a toy.
What Do You Need to Repair a Toy?
Repairing a toy doesn’t need to be difficult. If something has snapped off, think about if you can reattach it. Or do you need to improvise to replace a broken part? Most of the time you can find all the materials and equipment around the home. Think about using things like glue, sticky tape or string. If you don’t have any at home right now, you can easily get some from the nearest supermarket. Then, you simply use whatever you have in your house to repair the broken toy.
Step One: Clean the Broken Surfaces
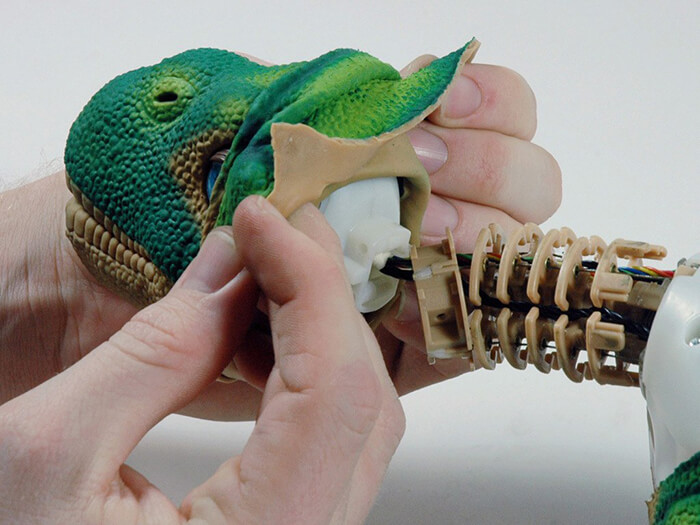
Before you try to reattach any broken parts, you first need to make sure both the surfaces are clean. Remove any grime or debris using a damp tissue. The goal of this is to make sure you have as much surface area as possible to make the bond. This applies if you’re using any adhesive or sticky tape. If you’re improvising using a string, you can skip this step.
Step Two: Make the Repair
Let’s say your child has broken the arm off her favourite doll. After you’ve cleaned the surface, apply a glue and attach the two pieces together. Make sure you hold both places in position with a firm grip for the glue to set. Then put your toy someone to allow everything to solidify and harden. More often than not, the bond only reaches its full strength after 24 hours. So if you’ve recently repaired the toy, you child will have to wait until tomorrow before they can play with it. Again, this step may not apply if you’re repairing using a different type of material.
Step Three: Clean the Repair
The last step is to clean the area around the repair. This applies for all material including glue, sticky tape and string among others. If you find any rough or hard pieces of debris, use a nail file to remove them. You can then use a damp cloth to clean the remaining area. A small dab of nail polish remover can work wonders to clean up any stubborn remains. You don’t want to leave any rough areas around the repair or any areas of stickiness. And finally, have a word with your child and convince them to be extra careful next time they play with this particular toy!
Avoiding a Disaster
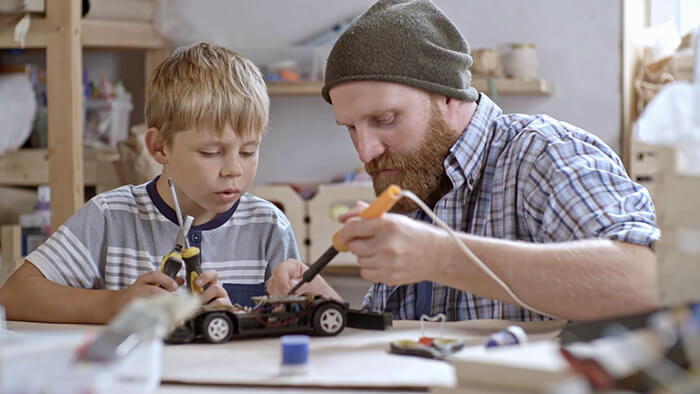
Following the four basic steps outline above, you can repair your child’s favourite toy in a matter of minutes. And all you need is a few household tools and some superglue. Never again will you need to worry about coming home from work to an endless tantrum!