

Introduction
Visualize a perfume bottle set on a cluttered desk. Not exactly what you’d like to see as a product ad, right? Now, take away all the clutter and insert a white background! That is the power of background removal.
You’ve undoubtedly used Remove.bg for instant cutouts over the years. Sadly, the website is closing on December 1, 2026.
Well, how does Designkit AI background remover perform? We took some product and lifestyle photos, tested the front and back edge quality, detail and usability with the same design.
The 30-second mental model: mask → matte → composite
Have you ever noticed how certain background cutouts seem perfect, while others have those strange rough-and-tumble edges? The solution comes down to three factors.
- First, there’s the Mask. The mask shows what should be removed (or in), pixel by pixel. Easy enough for an object with hard edges like a mug or sneaker?
- And the Matte. This is what you use for those more complicated, semi-transparent spots in the way of hair, glass, or any other flimsy fabrics. Now it is fun!
- And lastly, the Composite. This is where your mask gets placed on a new background. Spot any of those bad edges? That is when you will notice white halos, jagged edges, or a plastic appearance.
One little tip: Keep your cutout as PNG or WebP with transparency. JPG is not made for transparent backgrounds!
So, what’s the catch? You can have a perfect background removal but make a complete mess of the delicate edges. And when you get to the new background, those imperfections are completely visible!
How We Set Up the Test
Same images. Same guidelines. No unfair shortcuts!
To maintain fairness, we used identical images and sizes for the tests on both Designkit, Remove.bg.
- Automatic results first: We checked each original cutout against the others first with no manual touch-ups.
- Display size: We matched the screen size for a clear comparison, since Remove.bg’s free preview version has lower resolution.
- Background tests: We checked the cutouts on transparent, white, and colored backgrounds. The haloes might try to hide but they won’t be able to for long!
- Ease of use: We looked at whether login or registration was required, the possibility of batch processing, and download limitations.
- Tourists: We observed how each tool handled the final product or whether it could be a product shot.
Test: can both tools make a product ready for a storefront?
A clean background can make all the difference, right? But what if the tool cuts the top off a shoelace or destroys a product label? Not exactly what you want for a boost in sales!
And how do Designkit and Remove.bg do with difficult products? We’ve picked out two difficult items to see.
The Products: Glass, Laces, and Tricky Edges
| Test image | What makes it tricky? | What we checked |
|---|---|---|
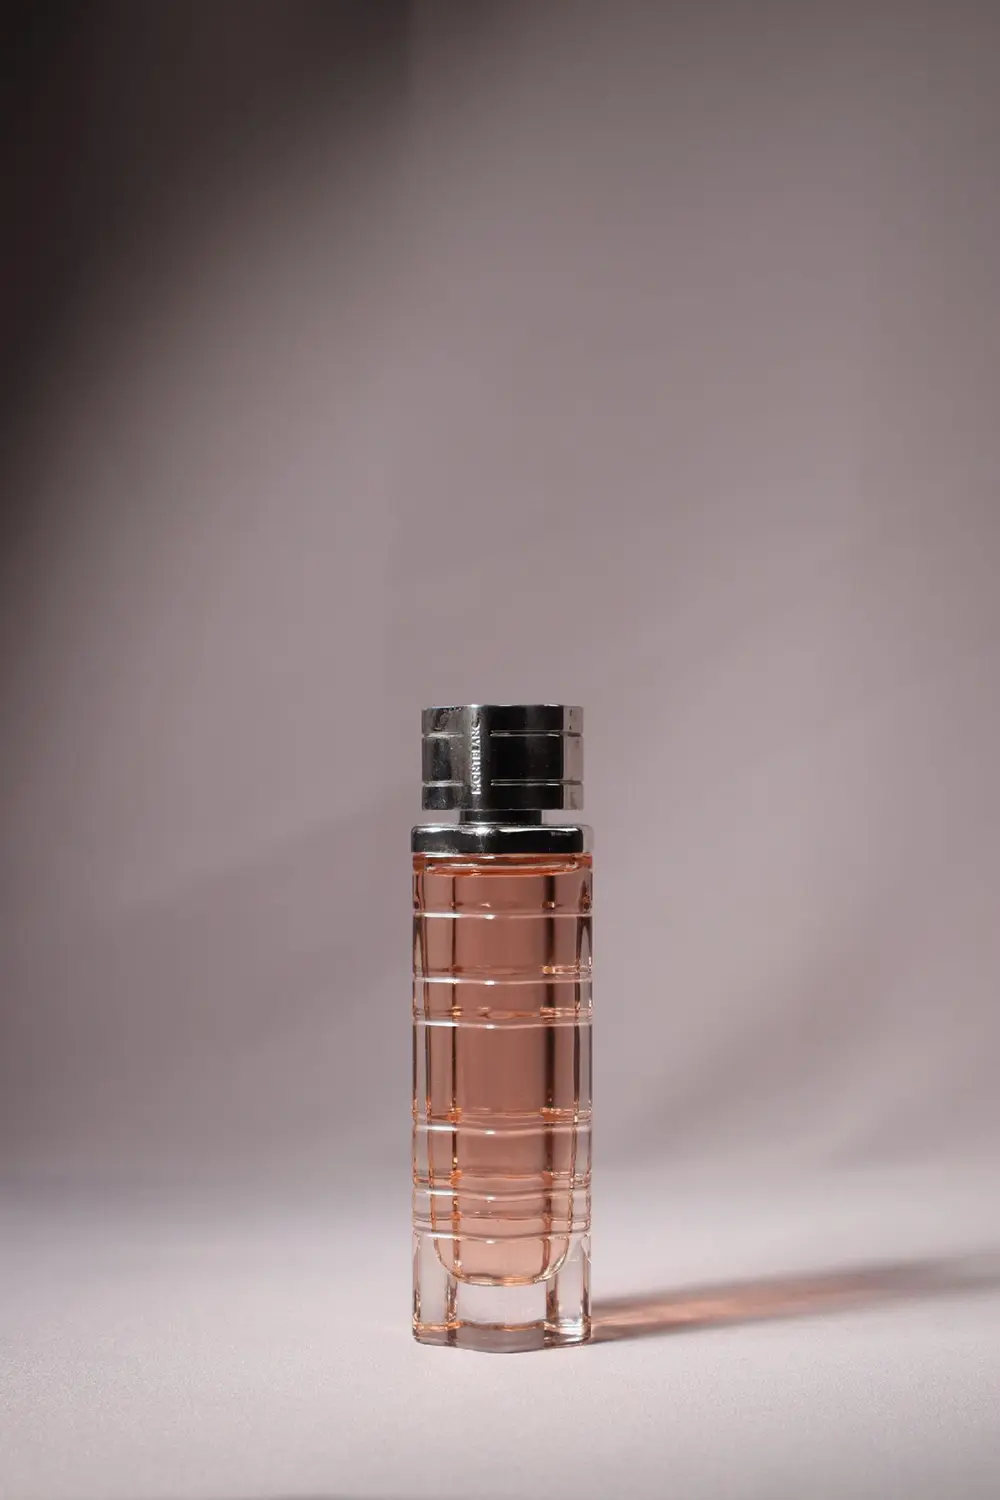
| Image A: Perfume bottle | Transparent glass, shiny cap, printed label, and soft shadows | Glass edges, cap, label, and natural shadows |
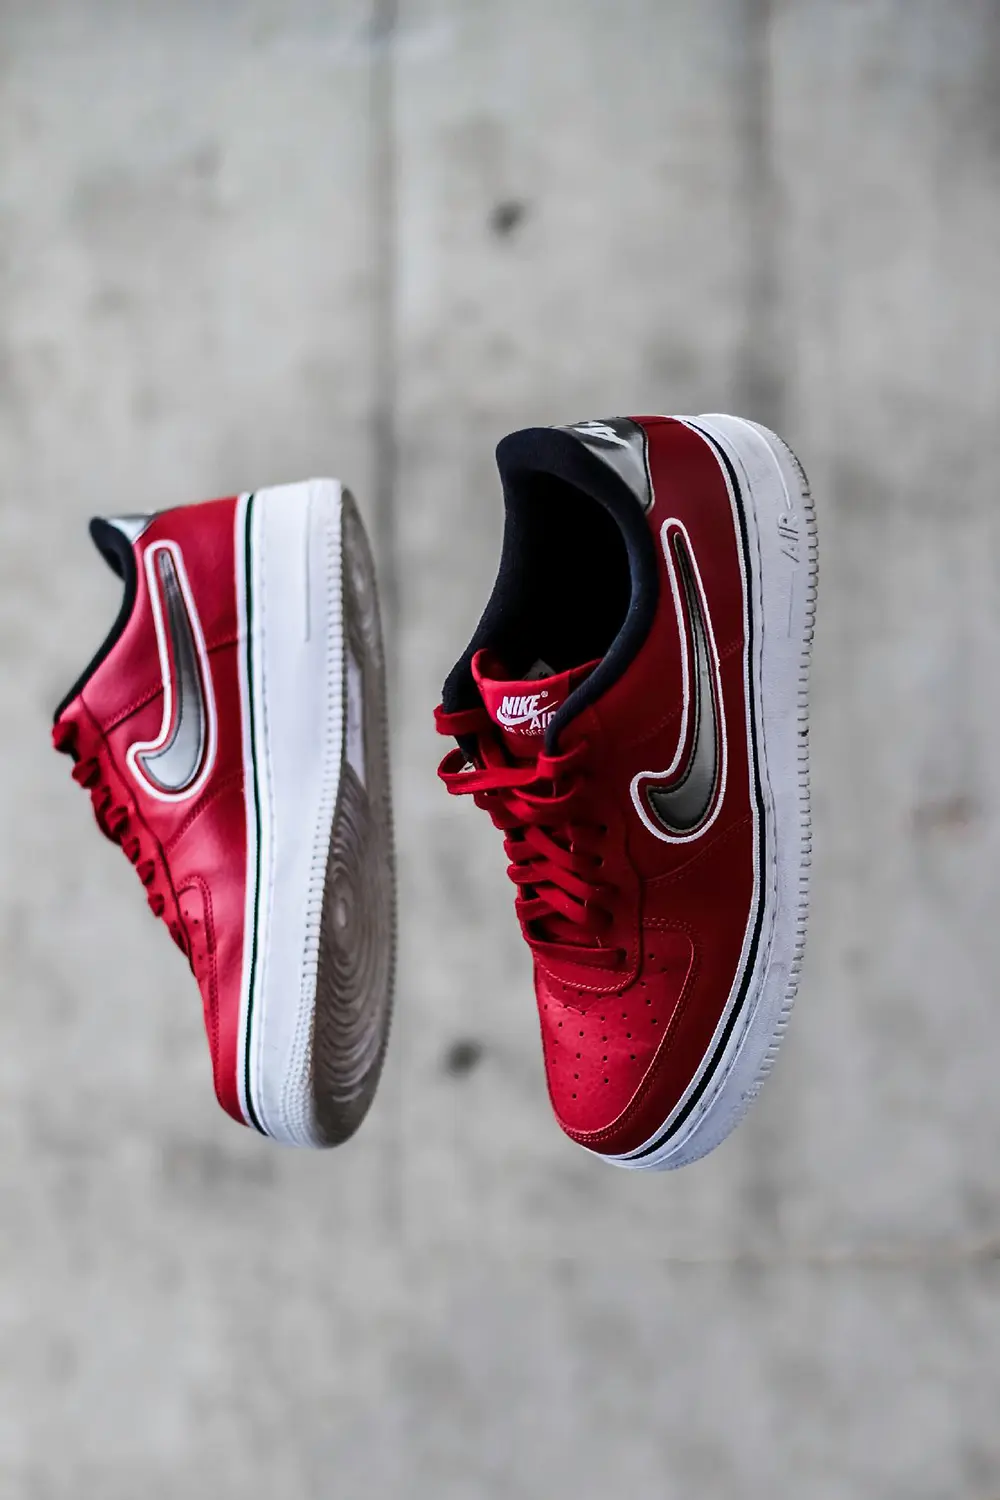
| Image B: Sneaker | Thin laces, mesh fabric, textured sole, and busy background | Lace gaps, mesh details, sole edges, and leftover background |
Sounds simple? These tiny details are where background removers often struggle.
Designkit vs Remove.bg: The Side-by-Side Results
Interested to see how Designkit vs Remove.bg, compare for first pass cutouts? We test both side by side, without touching up one bit of the images. Want to know who came out on top?
Here’s what you should look for:
- Perfume bottle: Are the glass edges smooth? Are the metal caps still in place? Is the product’s name written clearly?
- Sneaker: Are the laces folded? Does the mesh look authentic? Is the sole textured?
Next, we thought about how the cutouts looked with both white and bright backgrounds. I mean, a cutout that shines on transparency may not do so on a product listing.
Test 1: Glass Perfume Bottle
Designkit did a better job with the tricky glass edges. The metallic cap looked clean, the label stayed intact, and the transparent areas appeared more natural.
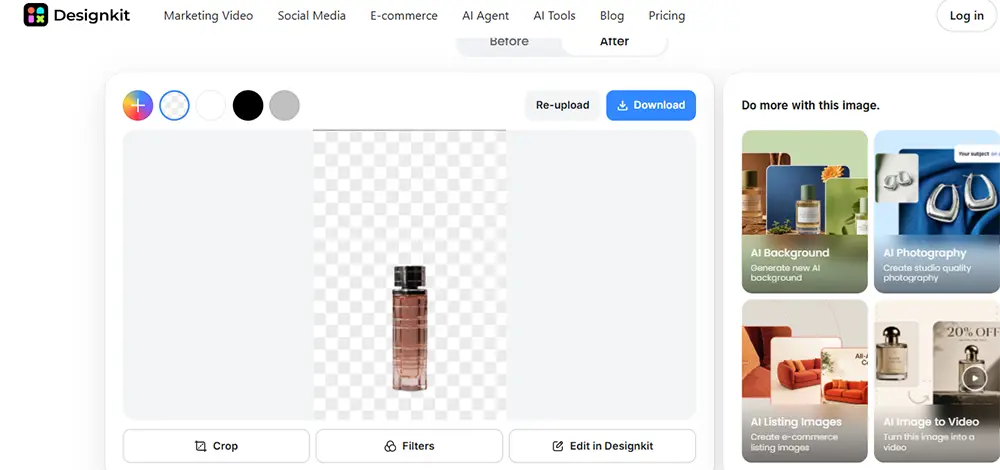
Remove.bg handled the main shape well, but some glass edges looked less natural, especially against a colored background.
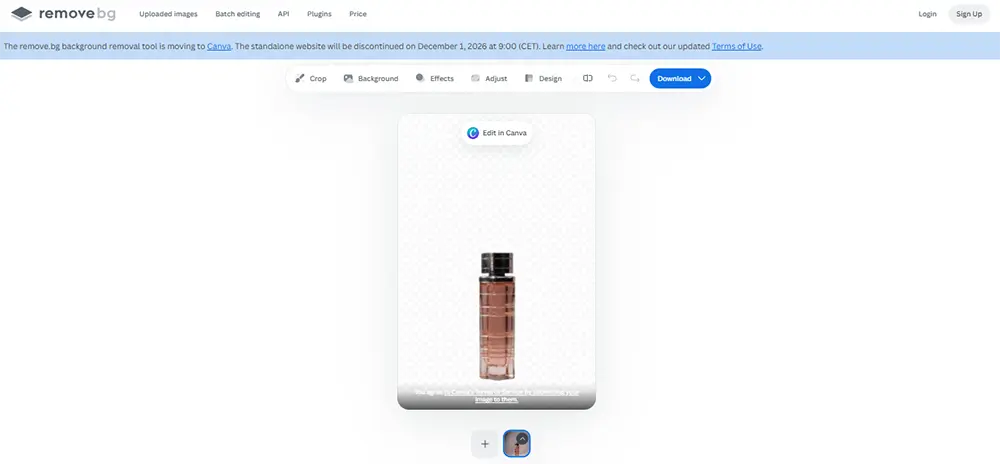
Winner: Designkit for better transparency and cleaner details.
Test 2: Sneaker With Fine Details
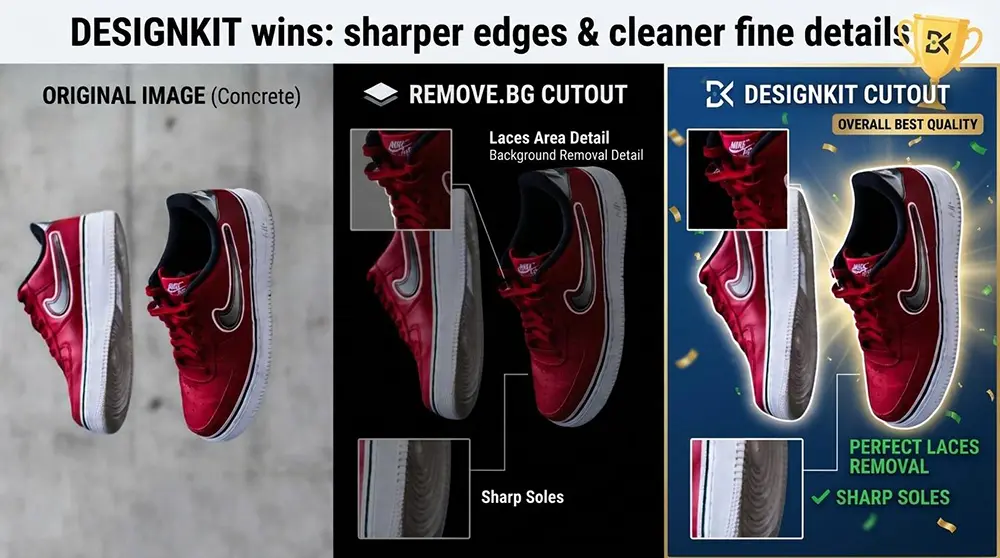
Designkit impressed us again. It kept the thin laces, mesh texture, and sole edges looking clean. There were also fewer visible background leftovers.
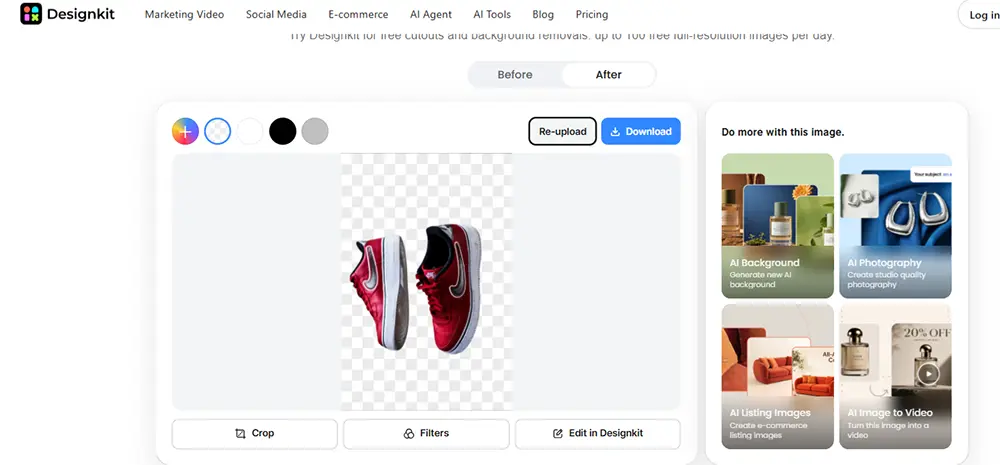
Remove.bg produced a decent cutout, but some narrow gaps and lace edges needed extra attention.
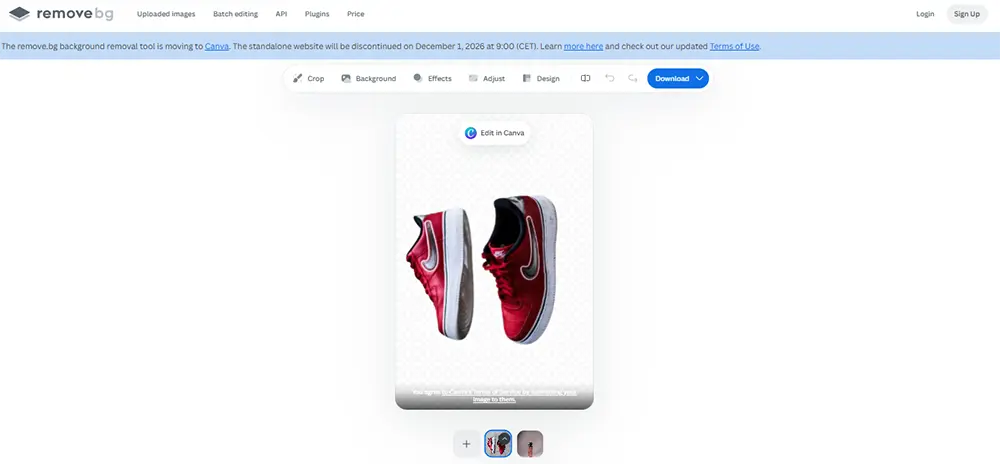
Winner: Designkit for preserving fine details.
Beyond Background Removal: Making Products Store-Ready
Here’s where Designkit offers more creative options.
Instead of stopping at a transparent cutout, you can turn the image into something ready for your online store.
- Transparent PNG: Keep the product isolated for future designs.
- White or custom backgrounds: Create clean product listings or match your brand colors.
- Resize presets: Prepare images for Amazon, Shopify, eBay, Etsy, and other platforms.
- AI product photography: Create polished product visuals without arranging another photoshoot.
- Lifestyle product photography: Place products in realistic scenes instead of using plain backgrounds.
The bottom line? A clean cutout is only half the job. On the storefront, the cap, label, and fine details are part of what you’re selling. Lose them, and you might lose the customer too!
The workflow difference: removing a background vs finishing a design
Both tools get rid of the background. Now what? That’s where it gets fun!
Remove.bg: Easy & Fast Cutouts
What it does: Remove.bg is all about just that, removing backgrounds quickly. Use the desktop app and API to take on those massive batches.
And here is the catch! If you didn’t know, they are shutting down the standalone website on December 1, 2026, you would no longer be able to use Background remover on their website – it will go to Canva, and the API will go to Leonardo.Ai.
But what happens to your pay-as-you-go credits? They will run out on that date.
Designkit: from cutout to ready-to-use asset
We tested Designkit to find out how much we could do beyond background removal. Here is what we liked: the ease of use. Upload an image, preview the cut out without signing up, set it to a white background, a custom color or new scene.
Designkit allows up to 100 free removals daily and supports batches of 15 images. You can also download images without watermarks. Pretty handy when you’re working with several product photos!
Still, if you’re looking for a Remove.bg alternative, Designkit is worth checking out, especially when you want to prepare images for more than one use.
Conclusion: Which Background Remover Should You Choose?
So, Designkit or Remove.bg? Well, it depends on what you’re working with!
Remove.bg is a great tool for rapidly getting backgrounds out of your photos. It works well for simple portraits and subjects with clean backgrounds. Designkit goes further in offering more possibilities after the background has been erased, though.
We really liked how Designkit let us effortlessly switch from a simple cutout to a product image on a totally different background with the right size for an online store. Not to mention the free daily limit and batch uploads as additional benefits.
Of course, none of these tools comes without drawbacks, we suppose. The very fine edges, lace details, etc., need a thorough check.