

Are you interested in your family history, and would like to learn more about your ancestry? Then the best way to represent and keep this treasured information is to create a genealogy chart. Your own family tree will show you and your relatives a connection to your heritage, along with the relation of your ancestors to some historical events. It will help you to establish rights of inheritance and rights to property, to trace genetics and find out more about where your family came from, what jobs your relatives did and save the history of your own family for generations to come.
Making a family tree can be both a lot of work and fun! So let’s have a look at our top tips on creating your significant artwork.
1. Start your trip down your family memory lane with research.
First, make a list of your relatives you want to learn more about and include into your tree. Ask your parents and other relatives about names and any information they remember. Then you can go to the local archive or research websites that provide their users with information on their lineage for some price. Do not limit yourself with only names and dates of lives, try to find out about your relatives’ occupations, significant achievements, and some interesting trivia about them.
2. Make the first draft of your family tree.
As soon as you have built up enough information about your relatives you can start creating your project. Begin with a simple draft using a sheet of paper and a pencil. Think about the way you place photos on the branches of your tree and what information can fit into available space. Try to note down not only your family members’ names and dates of life but incorporate some significant information about them.
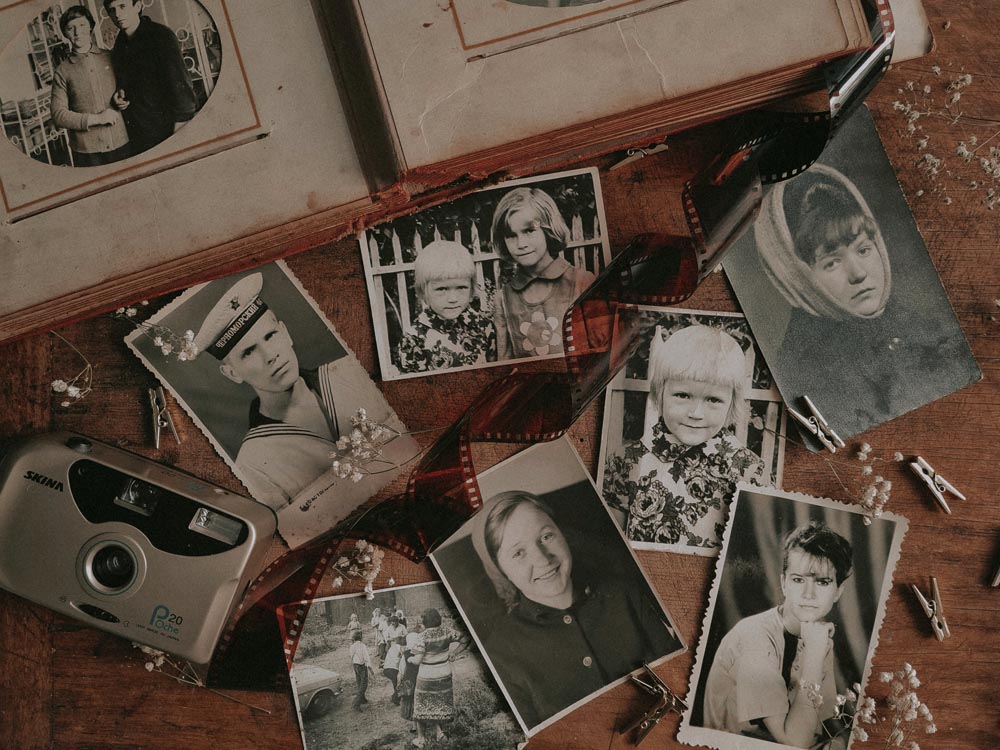
3. Prepare pictures for your project.
We know old pictures can get torn, stained, the colors in them can fade with the passage of time. Well, the good news is that your treasured pictures are not ruined. You still can save them! There are a few ways to do it. You can go to a special service and have your pictures improved by a photography specialist which can be quite pricey. Or you can do it yourself with the help of a powerful photo restoration program that you purchase once and then use whenever and wherever you want. With this kind of program, you can easily remove stains, tears, scratches, creases from your family pictures. The software has useful features for restoring colors to faded and even washed-out images. What’s more, you can further improve your family photos and colorize black and white pictures from your archive in a click.

4. Craft your own family tree.
You will need printed photos, a piece of cardboard or a few, glue, scissors, a dark blue or black marker pen, crayons, colored pencils or paints and some brushes of different size. To make your artwork even more creative you can incorporate more intricate materials like old coins, dried flowers, or seashells into it. When everything is ready it’s time to start creating your project. You can do all by yourself or assign a task to every family member. It can be a good way to spend time together and have fun listening to stories about your relatives and answering your kids’ questions.
5. Show your genealogy tree.
Once you have finished your family project, you can proudly display it in your home. Find a proper place for the artwork. Opt for a well-lit area that is not really close to a window, so the sunlight could not make the colors fade away. Then put it on such height so both kids and adults could easily see the photos and read the information. You can also take a photo of your family tree and send it to your relatives who live far away.
That was an easy way to make your genealogical tree and spend great time with your family creating your project together. We believe you have also learned a lot about your ancestors while gathering all the information and preparing pictures. It’s also important that the history of your family is saved and kids of your kids as well as future generations will know about their ancestors.